Difference between revisions of "Clean Install"
| Line 13: | Line 13: | ||
==Remove and Reinstall== | ==Remove and Reinstall== | ||
| − | * Press Windows Key + R and enter 'control appwiz.cpl'. | + | * Press '''Windows Key + R''' and enter '''control appwiz.cpl''' (This works on all versions of Windows). |
[[File:Add_Remove_Programs.png]] | [[File:Add_Remove_Programs.png]] | ||
* This will open Add/Remove Programs. Select Catznip from the list and uninstall as normal. | * This will open Add/Remove Programs. Select Catznip from the list and uninstall as normal. | ||
Revision as of 19:25, 30 July 2013
A clean install is a manual procedure that removes the viewer, all cache, configuration files and replaces it with a completely fresh install. If you are doing this as part of a viewer update, then we recommend you follow ALL of the steps below in order.
If you are not installing a newer version of Catznip then you should read our Troubleshooting Guide first. We recommend you start the viewer after each step and check if that step solved your problem, you might not need to complete all steps.
Contents
Windows
These instructions require the use of windows explorer. This can be started by pressing the Windows Key + E.
Remove settings
Windows Vista, 7 & 8
Windows XP
Remove the cache
Remove and Reinstall
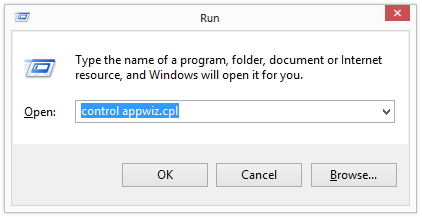
- Press Windows Key + R and enter control appwiz.cpl (This works on all versions of Windows).
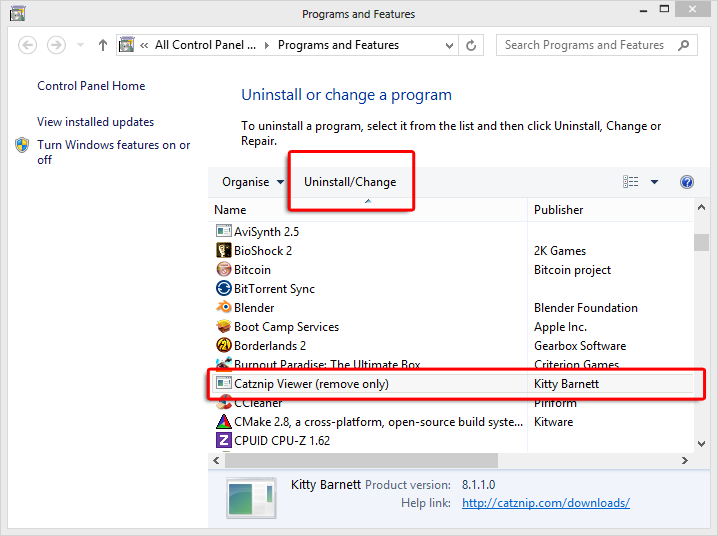
- This will open Add/Remove Programs. Select Catznip from the list and uninstall as normal.
- Download the Latest Release and install as normal.
Linux
The following commands can be entered into a console and should be fine regardless of distribution (although we do only use / test on the latest Ubuntu).
Remove settings
Remove the cache
Remove and Reinstall
- Download the Latest Release and install as normal.
Apple OSX
Remove settings
Remove the cache
Remove and Reinstall
- Drag the Catznip icon from Applications to the Trash.
- Download the Latest Release and install as normal.

